

Raw contour lines generated from a drone DTM usually look jagged and triangulated — a consequence of the mesh structure in photogrammetry outputs. This script smooths the raster first, then smooths the lines, to produce clean cartographic-quality contours ready for client maps.
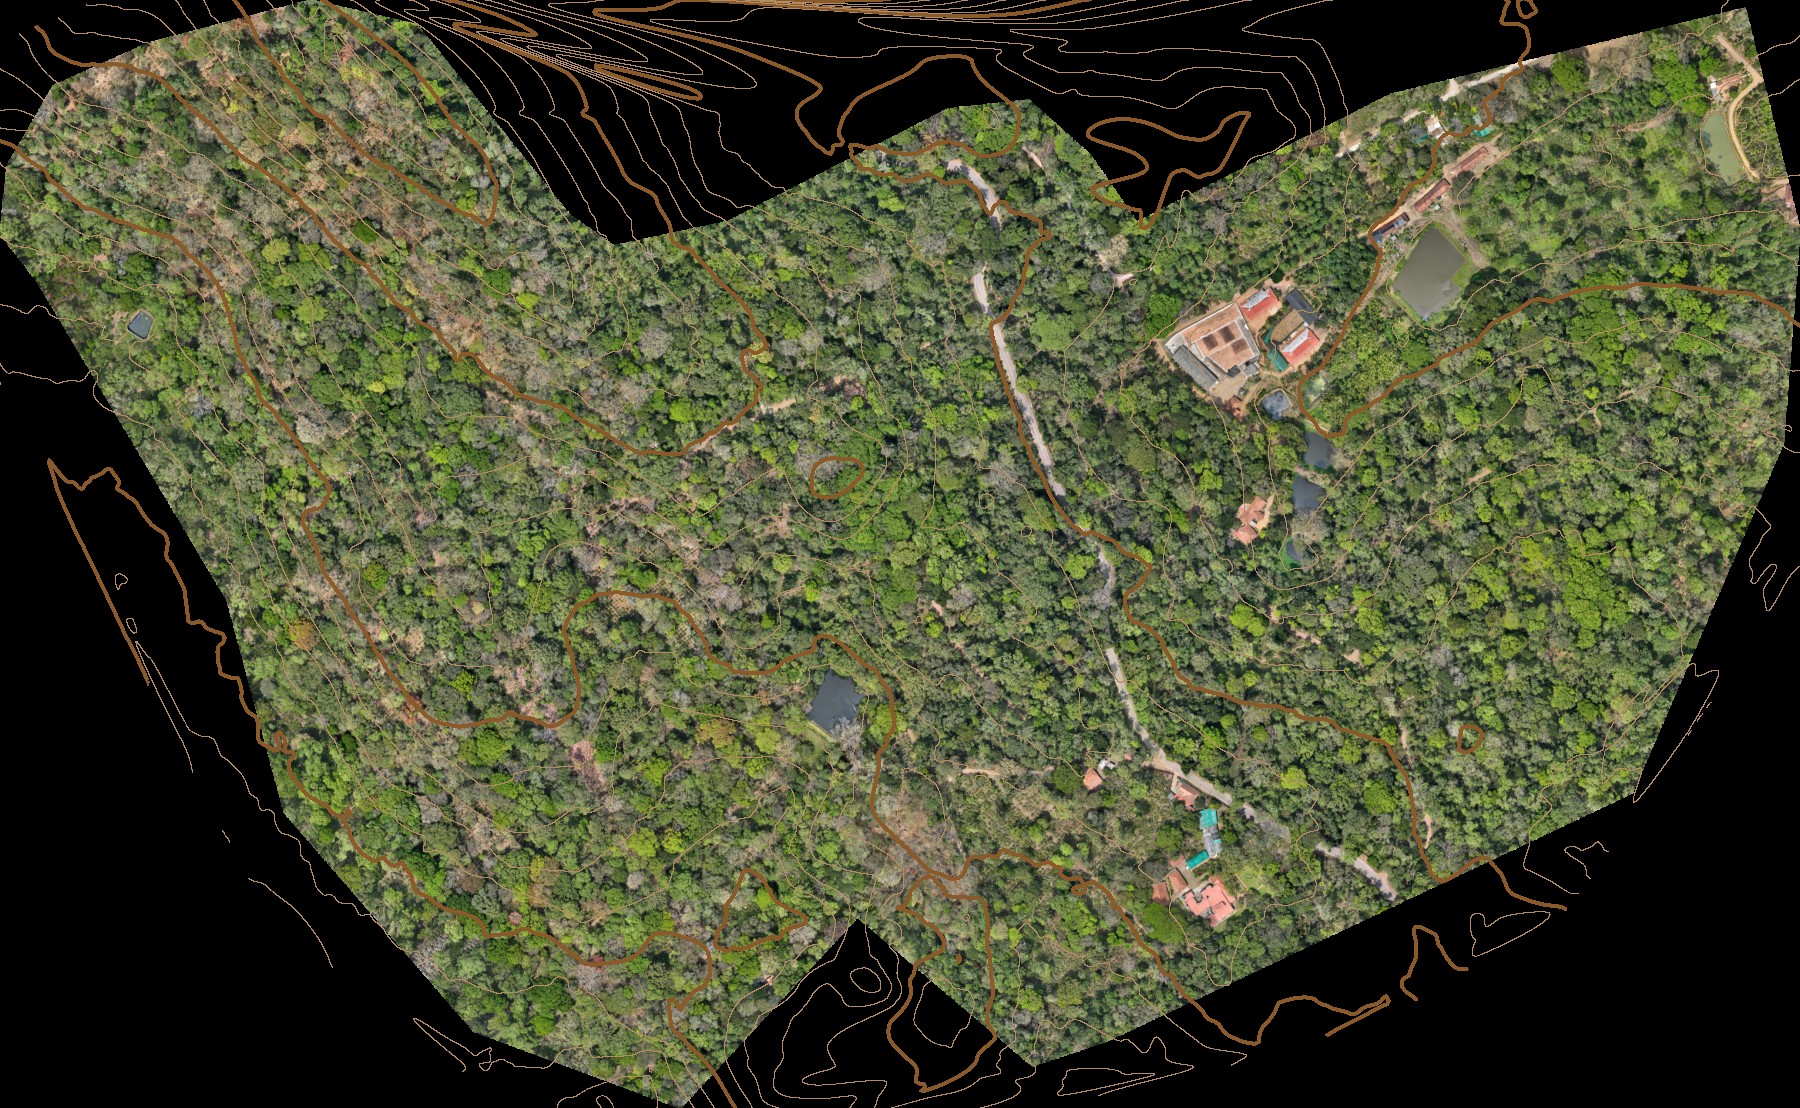
Here’s the real output on a forest estate survey — thick, labelled major contours every 25 m, thin minor contours every 5 m, draped over the orthomosaic:
What it does
The generate_contours.py script runs a three-stage process:
- Gaussian smoothing — applies a Gaussian filter to the DTM raster to remove the triangular mesh artefact
- Contour generation — runs QGIS’s built-in contour algorithm at your chosen interval
- Chaikin’s algorithm — smooths the resulting contour lines by iterative corner-cutting, removing the stepped appearance
Major contours (every Nth line) are styled thicker and labelled with their elevation in metres. The output is a single GeoJSON file added to your project.
What you need
- QGIS 3.28 or newer
numpy,scipy,osgeo.gdal(bundled with QGIS)- A DTM raster with “dtm” in the layer name, checked in the Layers panel
- The
generate_contours.pyscript from the Drone Mapping, Terrain & Multispectral Analysis QGIS Package
The DTM this script reads, as coloured hillshade — the ridge and valley lines the contours above trace out are already visible here:
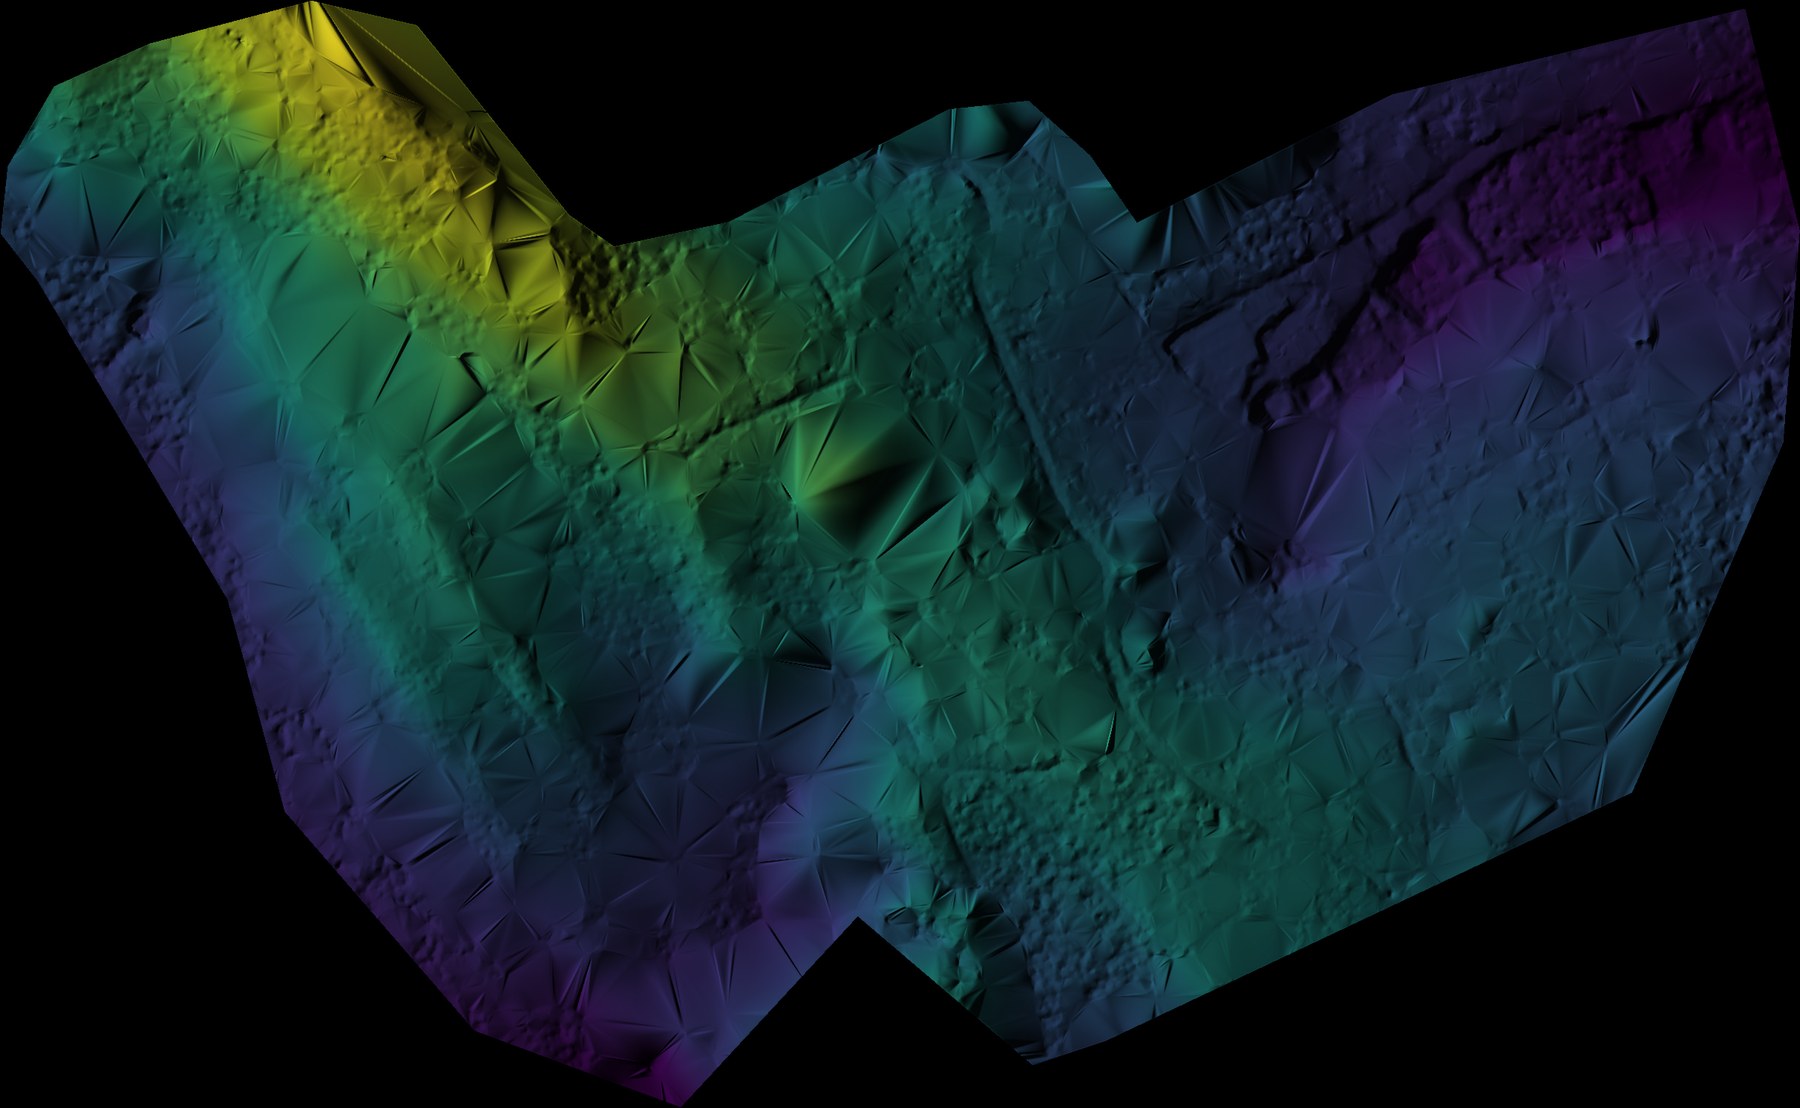
Generated with generate_hillshade.py — the same coloured-hillshade script used as the base layer throughout this series.
Steps
- Load your DTM raster into QGIS. The layer name must contain “dtm”.
- Check (tick) the DTM in the Layers panel.
- Open Plugins → Python Console → Show Editor.
- Paste the script. At the bottom, find the configurable parameters:
contour_interval— contour spacing in metres (default:5.0)smooth_sigma— Gaussian smoothing strength in pixels (default:3.0; recommended range 2–5, increase for very noisy DTMs)major_interval— every Nth contour is drawn thick and labelled (default:5, so major contours everycontour_interval × major_interval— 25 m at the defaults)line_smooth_iterations— Chaikin corner-cutting passes on the contour lines (default:3;0disables line smoothing)line_smooth_offset— Chaikin smoothing offset,0–0.5(default:0.25)
- Click Run.
The output {dtm_name}_contours_{contour_interval}m.geojson is saved in the DTM directory and added to your project with major/minor styling applied.
Choosing the right interval
| Terrain type | Suggested interval |
|---|---|
| Flat to gently sloping | 0.5–1 m |
| Undulating plantation terrain | 1–2 m |
| Hilly or steep terrain | 5–10 m |
| Mountain survey | 10–25 m |
Too small an interval on flat terrain produces dense, overlapping contours. Too large an interval on steep terrain misses detail. Start with 2 m and adjust.
Related scripts
- generate_contour_level_polygon.py — answers a different question from the same DTM: not “what does the terrain look like,” but “what area is at or below a specific elevation” (useful for flood/fill extent rather than cartographic contour lines)
- calculate_lake_volume.py — computes water storage volume for a lake or pond polygon on the same DTM
Get the script
generate_contours.py is part of the Drone Mapping, Terrain & Multispectral Analysis QGIS Package — all 16 QGIS automation scripts at $99 USD.