

After a drone survey of a reservoir or crater, you often need to estimate water storage volume. This script computes it directly in QGIS from your DTM raster and a boundary polygon — no external tools needed.
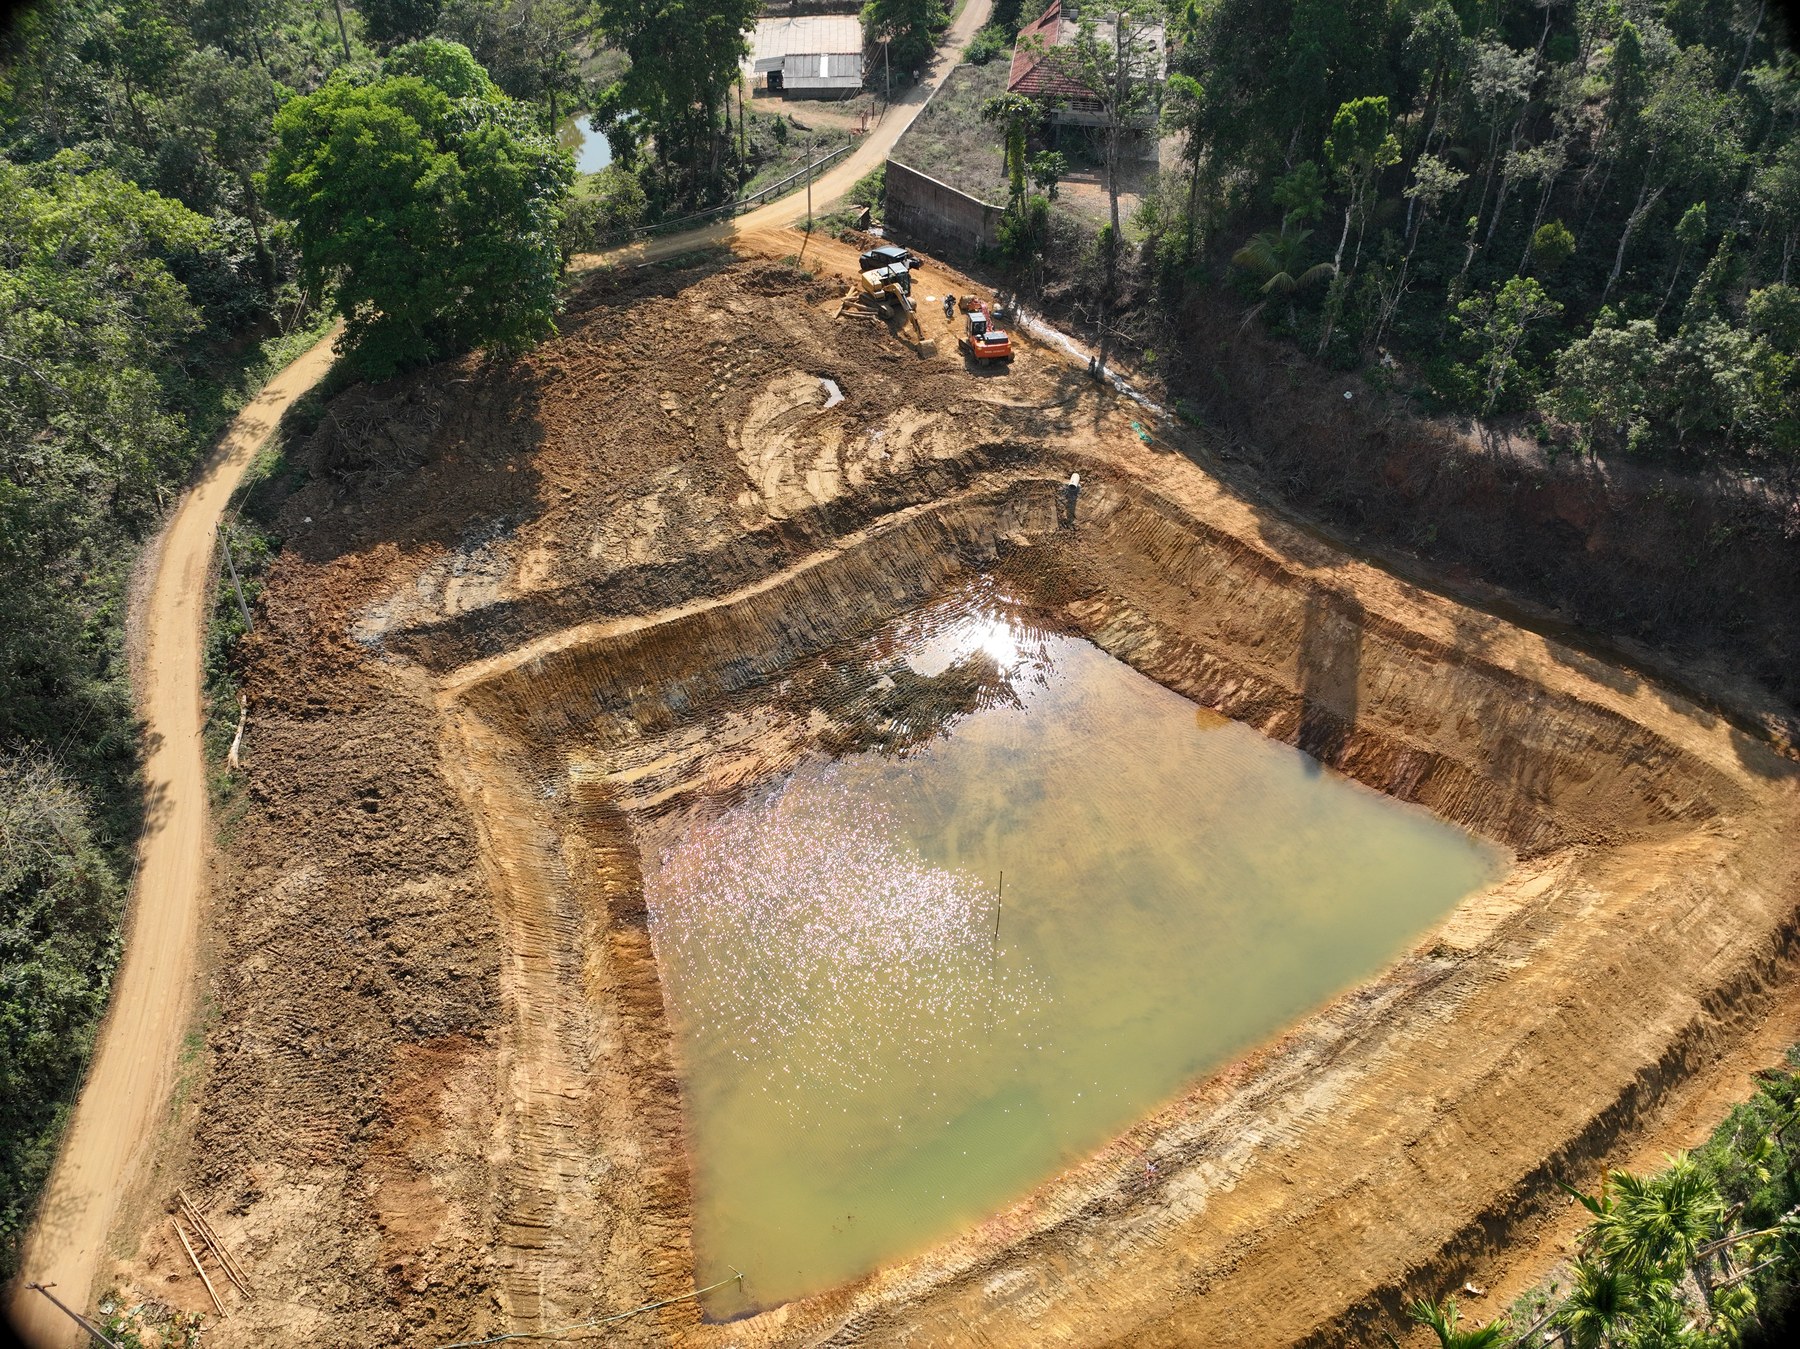
Here’s a real farm pond survey mid-construction — the kind of site this script is built for:
What it does
The calculate_lake_volume.py script takes a polygon layer defining the lake or crater boundary and a DTM raster. It samples the DTM elevations inside the polygon and compares them against a reference surface derived from the polygon’s own boundary edges. The difference gives the depth at each pixel.
Output:
- Volume in cubic metres, litres, and acre-feet — written to a text report
- A depth raster (
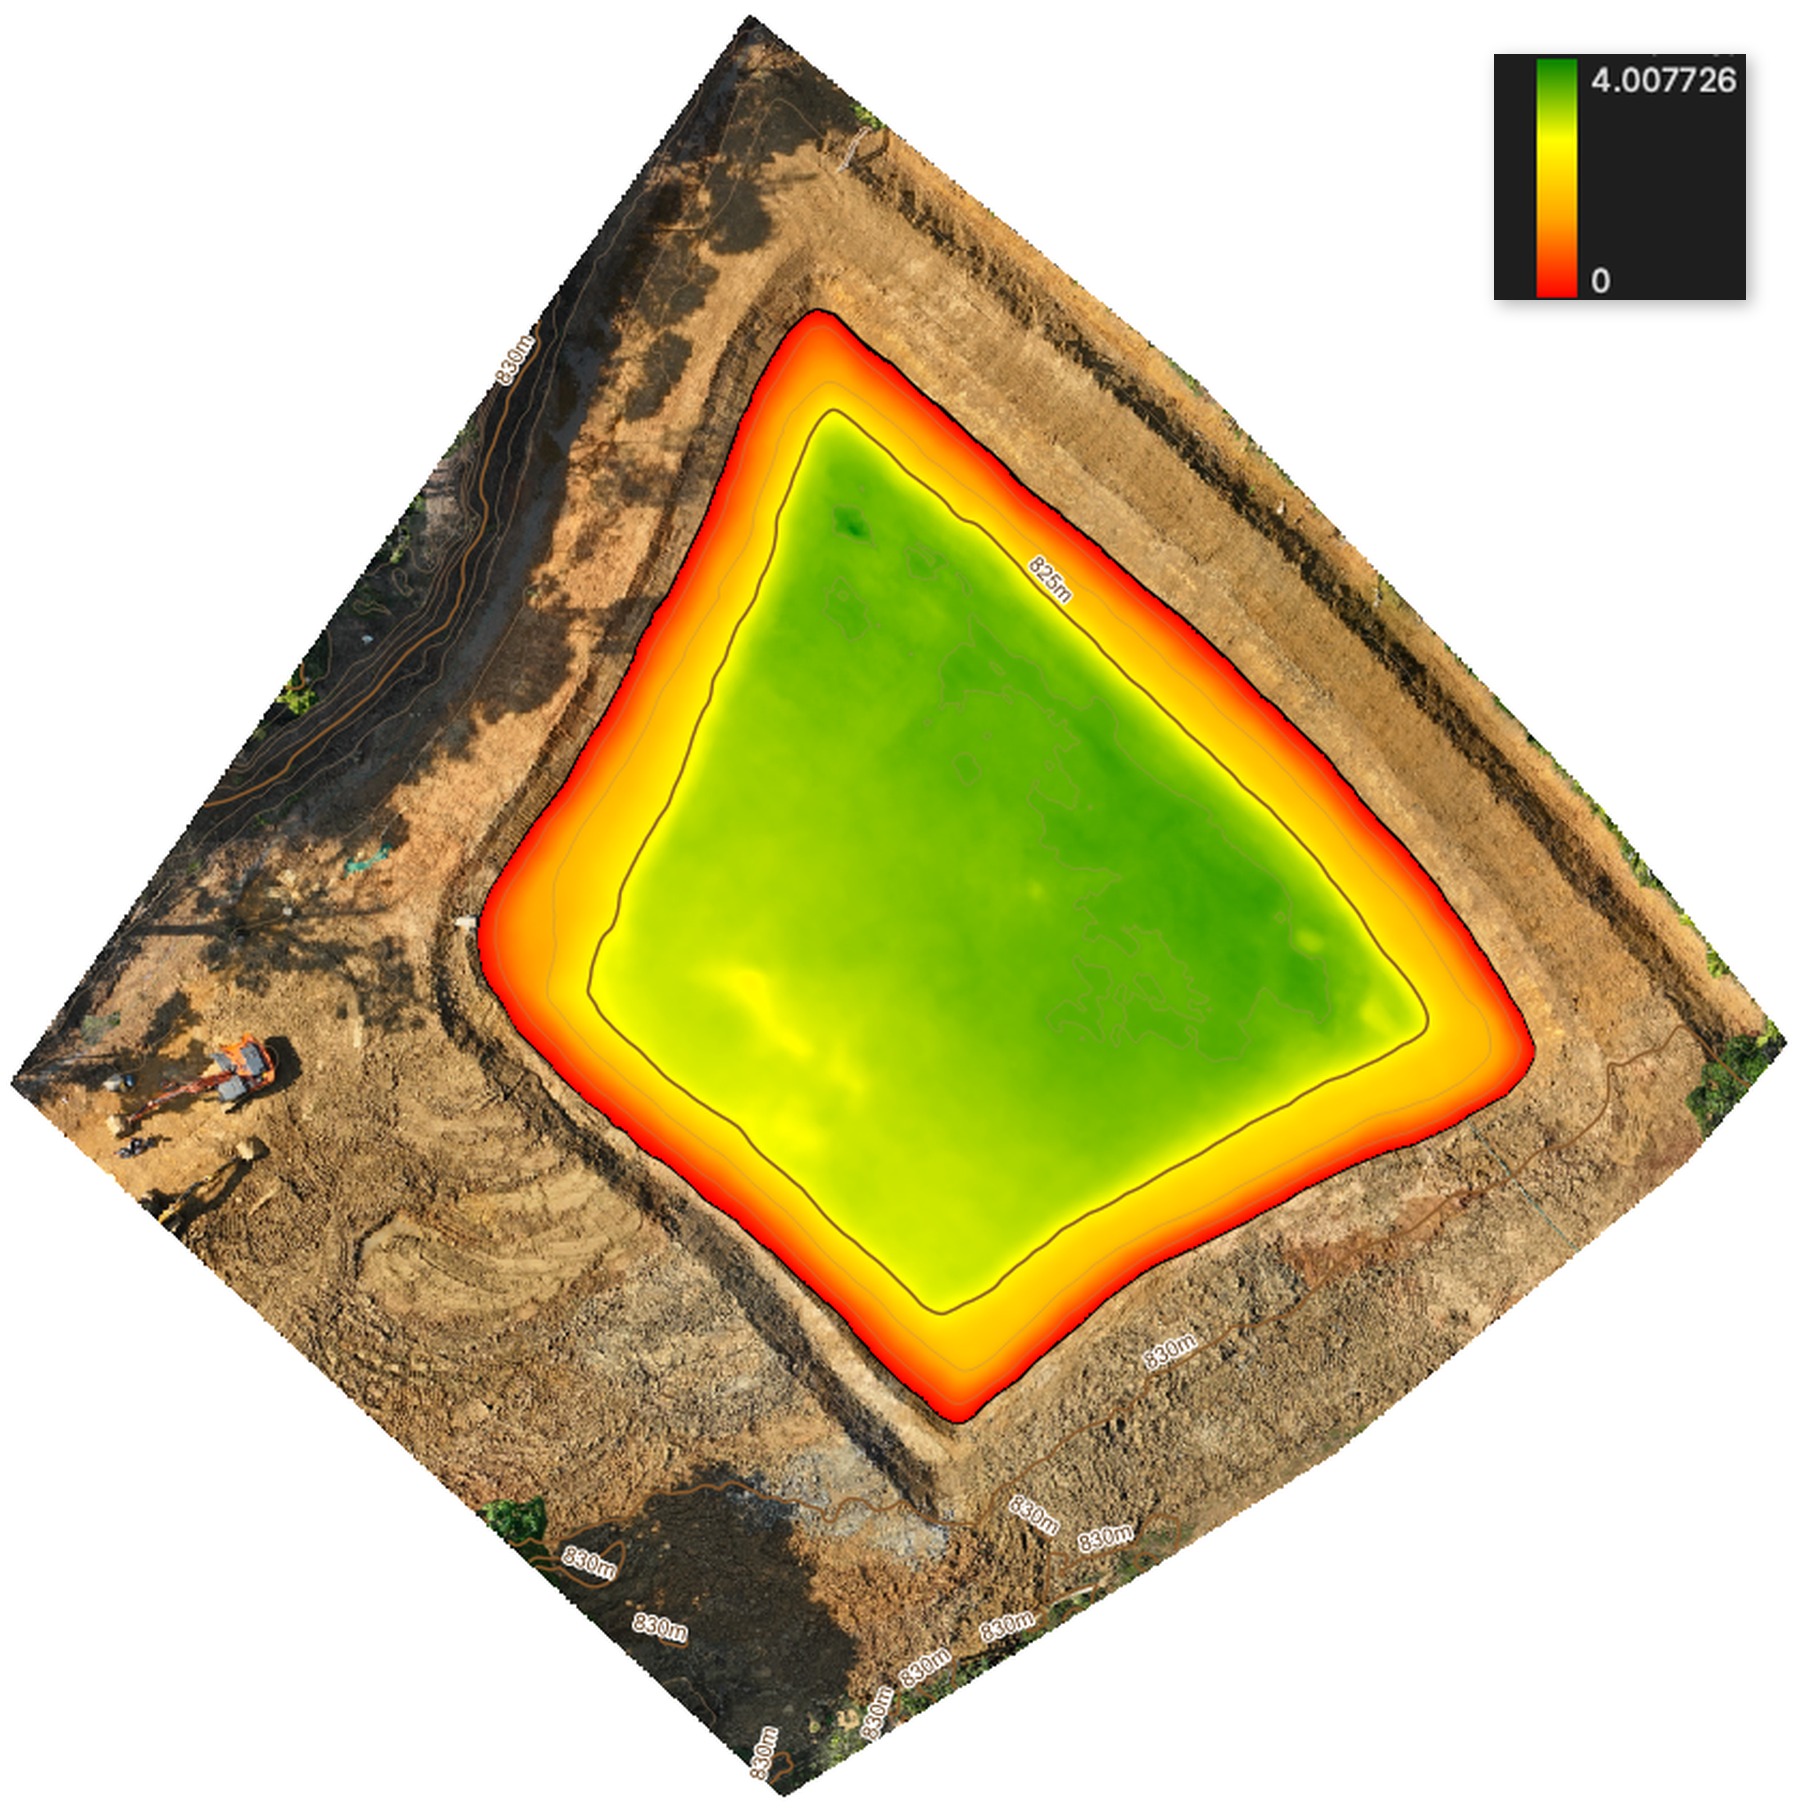
{lake_name}_volume_map.tif) styled red → green, showing how deep each pixel is relative to the reference surface
What you need
- QGIS 3.28 or newer
numpy,rasterio(bundled with QGIS)- A polygon layer defining the lake boundary — set as the active layer
- A DTM raster loaded into QGIS with “dtm” in the layer name
- The
calculate_lake_volume.pyscript from the Drone Mapping, Terrain & Multispectral Analysis QGIS Package
The DTM this script reads, as coloured hillshade — the excavated pond basin is clearly visible as the lower (purple) area:
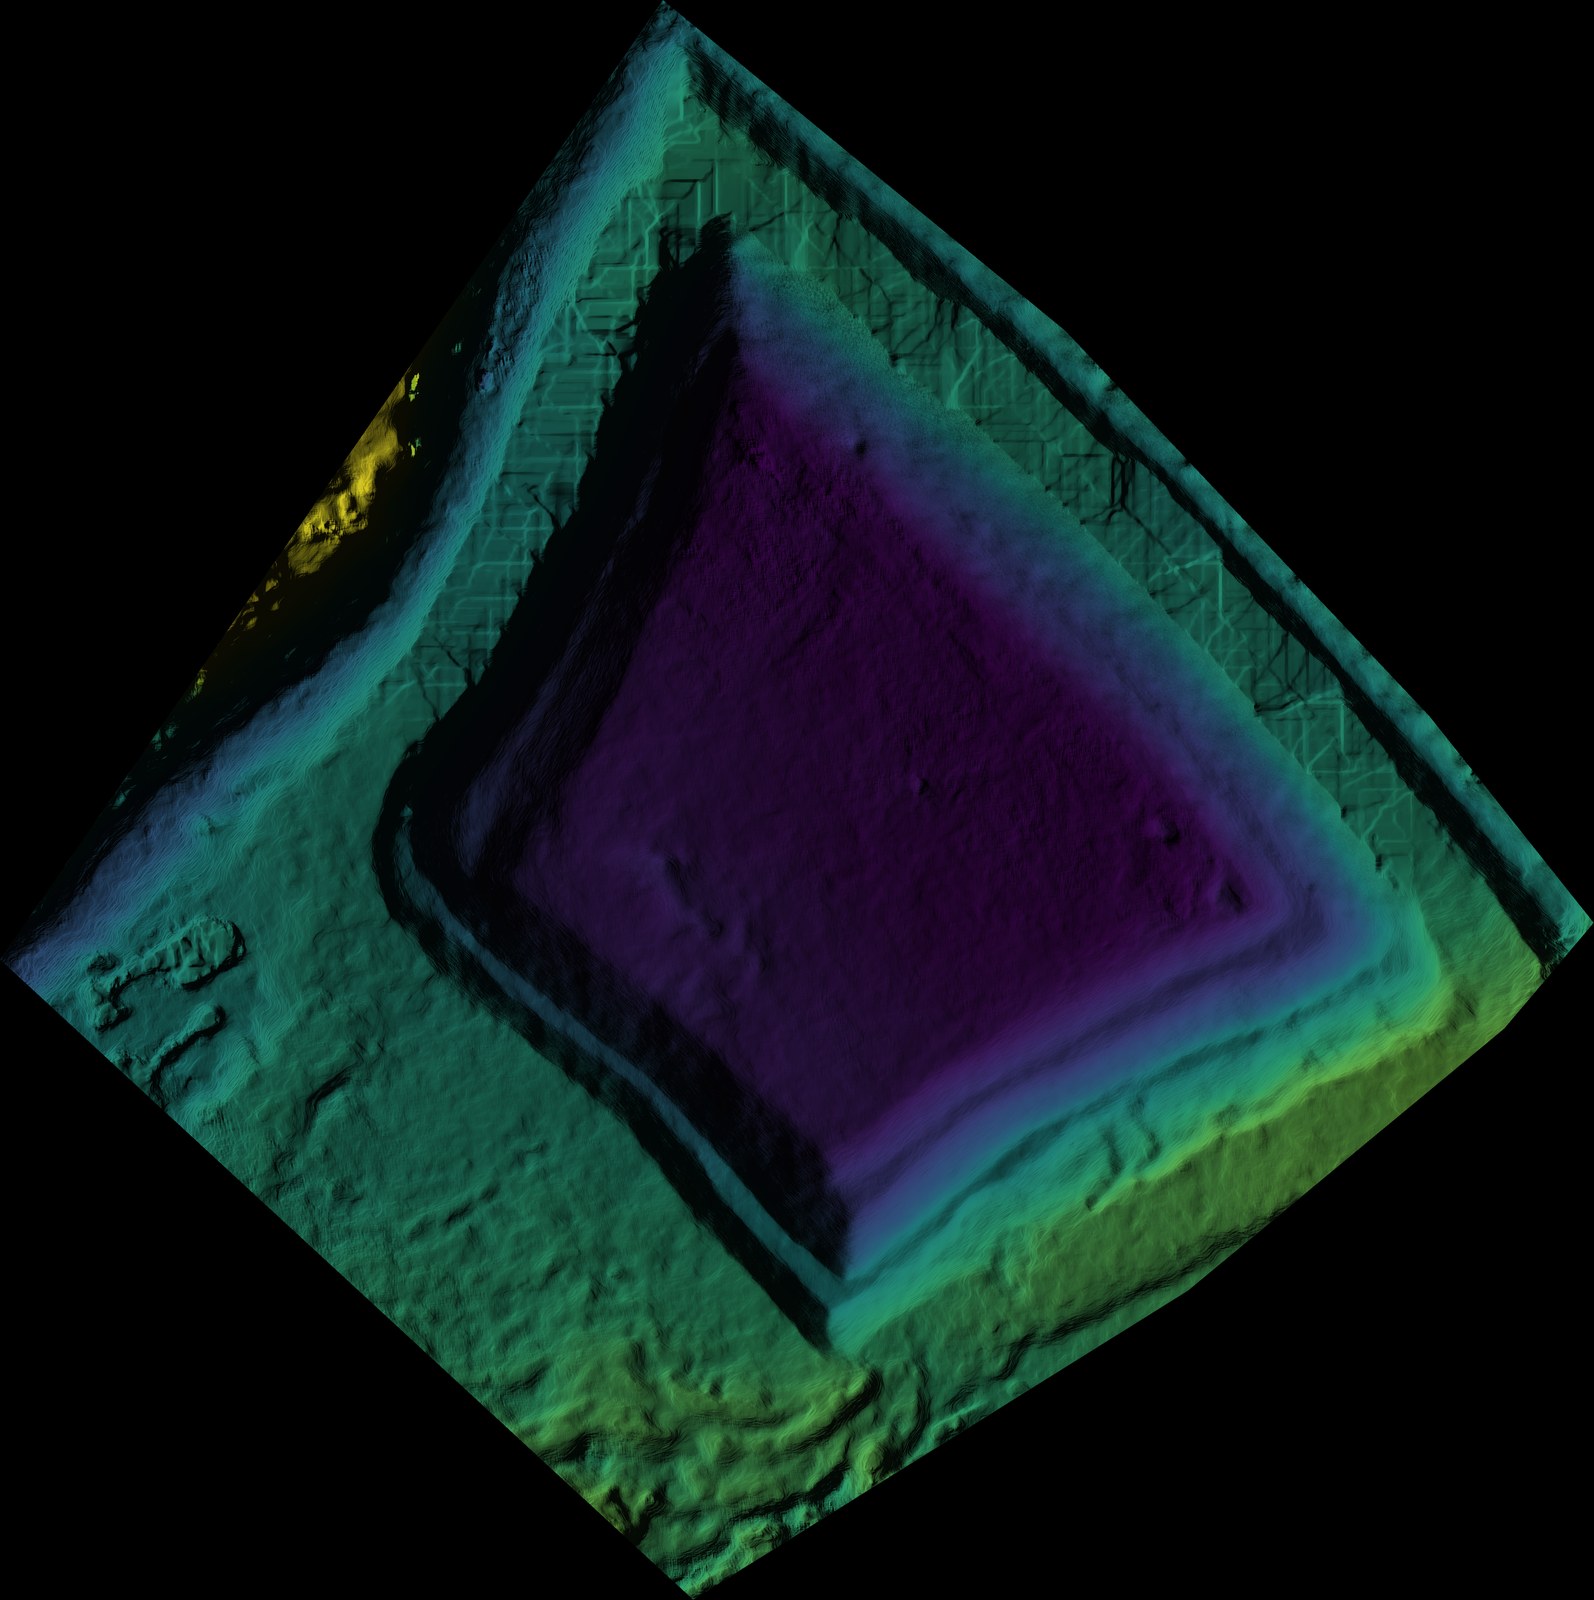
Generated with generate_hillshade.py — the same coloured-hillshade script used as the base layer throughout this series.
Steps
- Load your DTM raster into QGIS. Make sure the layer name contains “dtm”.
- Load the boundary polygon layer and click it to make it the active layer.
- Check (tick) the DTM raster in the Layers panel.
- Open Plugins → Python Console → Show Editor.
- Paste the script and click Run.
The depth raster is saved in the DTM’s directory and added to your project. The text report goes to 2.Session/Insights/ in the project directory structure (inferred from the DTM file path, created automatically if it doesn’t exist yet) — falling back to the DTM’s directory only if that folder can’t be created.
Here’s the depth raster on a real pond survey, styled red (shallow edge) to green (deepest point, ~4 m below the reference surface):
What the reference surface is
The script builds a reference surface by interpolating the DTM elevation values along the polygon boundary. This represents what the ground level would be if the lake were drained — essentially, the shoreline elevation. The volume is the space between that surface and the actual DTM values inside the polygon.
Configurable parameters
The script is self-contained and needs no changes for standard use. The polygon name is used to name the output files.
Related scripts
- generate_contour_level_polygon.py — answers a related but different question: not “how much water,” but “how far would it extend at a given level.” Useful for mapping flood extent or fill area at a target elevation from the same DTM.
Get the script
calculate_lake_volume.py is part of the Drone Mapping, Terrain & Multispectral Analysis QGIS Package — all 16 QGIS automation scripts at $99 USD.